Friday 27 July 2012

NOTD


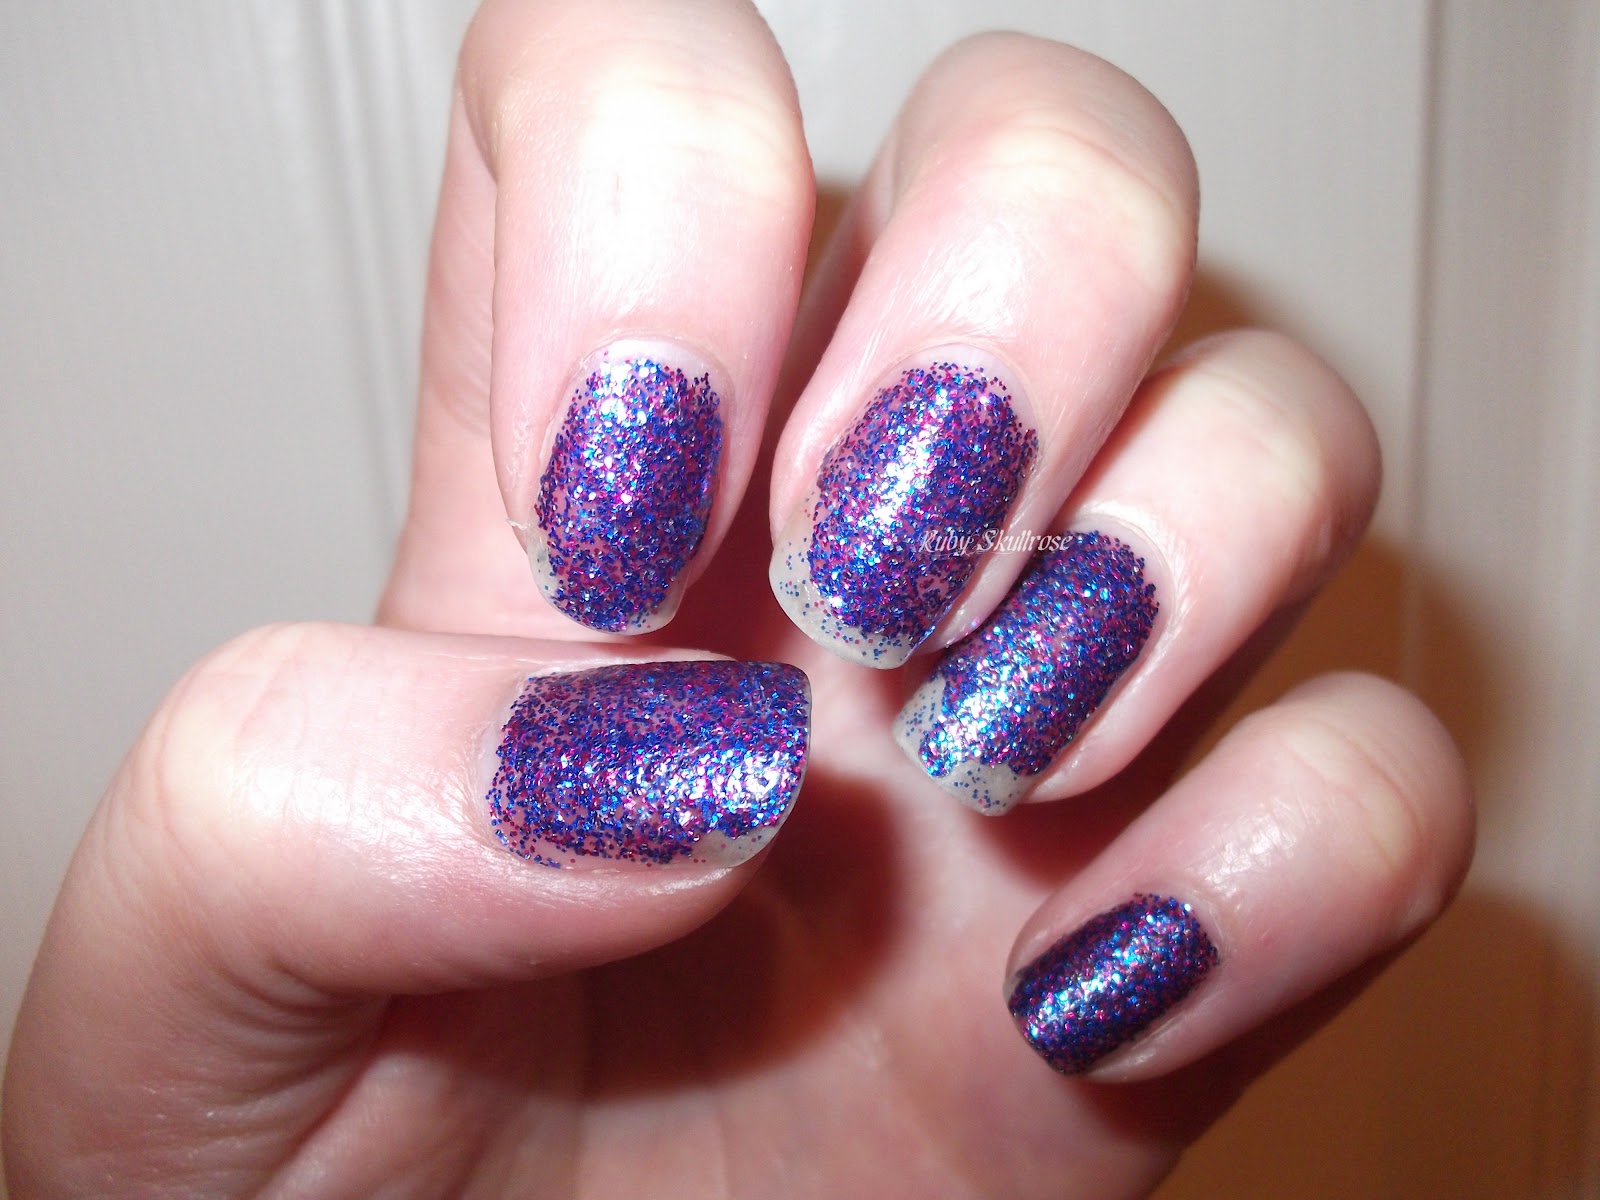
Hey guys I wanted to post this NOTD, but its more like Nail of a few weeks ago as I took a little break from blogging and didn't get a chance to put this up until today, anyway this nail polish is Angelica nail colour no. 66 "Guilty". You can purchase this nail polish from Penneys (Primark for   my English and Northern Ireland readers) and the best thing is it's only €2.79 a bottle! 


This is after three coats for to get it nice and opaque, I would recommend putting a base colour on first and then this nail polish over as I noticed after I took the photos that there were still some gaps between the glitter. I also didn't apply a top coat as I was curious to see how it wears. Here it is after 2 days but with not much use of my hands if that makes sense meaning it didn't really have a chance to chip.


And here is the nail polish after I was finished work on the second day. Quite a lot had chipped away but it could have more to do with the thick layers I put on and I really think this could be solved by first putting on a base colour and a top coat aswell.


I think if you see this nail polish you should definitely pick it up even for the colour alone, it's a stunning blue and pink glitter that looks great in the bottle and on the nails and good quality for the price, I can't wait for to try out other colours in this range...... Oh and to take it off you ask? I suggest you do the tinfoil method which you soak a cotton ball in nail polish remover and place it on your nail and secure it by wrapping some tinfoil around your finger, leave for ten minutes and then remove!

Until next time,
RubySkullrose xx

Monday 2 April 2012

Catrice Eyeshadow Base vs Urban Decay Primer Potion


Let me start this blog by saying yes I know, I have been M.I.A lately but you know moving house, working and life in general just got in the way. Then I was also feeling so uninspired. So I bring a review to you today to help me ease back into blogging because it's always at the back of my mind and well I flipping have missed it!

I picked up Catrice eyeshadow a while ago in my local pharmacy it retails at €4.49 for a 2.1ml tube, I couldn't resist picking it up and trying it out as I can't live without my Urban Decay Primer Potion which costs roughly around €17

Catrice ----------------------------------------------------------------------------------------Urban Decay

So the perfect time to test out these two products is when I was going to work so I did my usual work makeup which is very natural and basic, on my right eye which is now the eye on the left side (tad bit confusing...) I applied Catrice eyeshadow base and on the left eye which is now on your right I applied UDPP then my eyeshadow on top.

Both the primers feel smooth, Catrice's has more of a powdery feel to it while Urban Decay PP is more creamy. You'll notice on the eye with the Catrice eyeshadow base the eyeshadow colour doesn't seem as strong like Urban Decays Primer Potion makes it so Urban Decay wins the round for eyeshadow adhering well. So it's off to work I go to really put the two to the test!!

Catrice------------------------------------------------------------------------------------Urban Decay

So here are the results of my experiment:

Urban Decay Primer Potion:

  • Colour stayed on well, you could still see the crease colour when I came home
Catrice Eyeshadow Base:
  • Colour had faded although it was not overly dramatic difference although not as strong and pigmented looking as it was that morning
My conclusion is Urban Decay wins hands down, I't grabs more colour and the eyeshadow stays strong looking throughout the day, But it's not to say I will never use Catrice's eyeshadow base again maybe just for work looks so I can save my UDPP for more special events. I'd also like to point out that I have quite oily eyelids and eyeshadow doesn't last more than two hours if I don't wear a base, so I would like to see what people with dry or normal skin think of it I certainly wouldn't not try it out for under a fiver you won't be at much of a loss.

Until next time,
Ruby Skullrose xx


Saturday 28 January 2012

OOTD: Boyfriend's Birthday Celebrations

Heya guys so last week was my boyfriend's birthday, I decided to mix up my blog a little by doing an OOTD (Outfit of the day). We celebrated at home, had a couple of friends over for a few drinks and dance central party!

Here is my outfit in the full, I decided to go for casual dressy 

I got this feather necklace in Pennys, I've wore it quite a lot so it's a bit ruffled (see what I did there!)

I also got these peacock earrings in Penneys, I've been searching for  a pair for ages . They cost €3!

Here is a close up of the crop top I wore, It has a lovely lace detail


This is the bracelet from my Claires Accessories haul which you can check out here

These boots are about two years old they are a lovely suede wedge that I picked up from  Shoe Rack in Pamela Scotts


And here was my hair for the day which I followed a tutorial from this blog  I found on Pinterest


This was my eye makeup for the night, just something casual and quick with a little teal glitter thrown in for fun!


So that was my OOTD (or night I suppose). Hope you enjoyed this post as I will have more to follow just to keep things interesting. I had a wonderful night and my boyfriend enjoyed his celebration too!

Until next time,
RubySkullrose xx

Sunday 22 January 2012

Claires Accessories Haul

I was walking by my local Claires Accessories the other day when I spotted they had a sale on, items marked 4 euro or less and 3 for 2. I couldn't resist popping in and picking out a few pieces for to treat myself with some of my left over Christmas money. 

I just love this necklace it's so edgy yet elegant at the same time!

I couldn't pass up this wristband which added girly sparkle to suede

How badass is this ring 

These are just the cutest, can't wait to wear them hopefully they will make interesting conversation starters and I can find fellow bloggers while out and about.


Another love of mine, Photography :)


And finally a pair of earrings for to match my necklace
So thats what I bought! Expect to see these items in future OOTDs which I'm gonna start doing this week,
Until next time,
RubySkullrose xx

Saturday 26 November 2011

Skincare Routine and tips, I'ts as easy as 1,2,3!

Skincare is the first step to any makeup routine or just to having natural beautiful skin! So I thought I'd make a post sharing what two products I've been using since I was 14 years old!

So the products I've been using are Simple! Yup Simple skincare and I love them, I don't have sensitive skin but I have found alot of other cleansers I used were just too harsh, I also had an allergic reaction to one particular cleanser I tried in the past which left my face dry and red for a whole day. So since finding Simple's cleansing lotion and moisturiser I've never turned back, they contain no harsh chemicals, colouring or perfume which makes them particularly suitable for sensitive skin too.


I apply the cleansing lotion to a cotton pad and then dab a dot to my forhead, cheeks, nose and chin, I then take the same cotton pad and rub the dots into each area for to thoroughly cleanse my skin. Now at this point you could take Simples toner which is in a green bottle, I skip this step but plan on working it back in to my routine soon. A toner job is to even out the skintone and helps to minimise pores. I then take the moisturiser and apply it to my skin, its that easy. Now you are ready for to apply your foundation and the rest of your makeup! 


Also I have some simple tips that can help aid in having good skin:
  1. Drink plenty of water
  2. Avoid excessivly touching your face
  3. Clean your mobiles screen
  4. Clean your face makeup brushes and clean/replace sponges regularly
  5. Get plenty of exercise
  6. Get a good nights sleep
  7. Use sunscreen
  8. Eat fruit
Until next time,
RubySkullrose xx

Saturday 19 November 2011

Sorry it's been a while!

Sorry I have'nt been blogging lately, I was stuck in a bit of a rut and wasn't feeling inspired at all but I'm out of it and feeling fresh. I have a few new ideas for my blog and would like to try offer something different while still doing notd, fotd and reviews. I do plan on recording tutorials but lighting is not working in my favour, this month in Ireland the mornings do be fairly dull and the evenings are pitch black so I may have to look into ways to light my filming area first before I can deliver tutorials. Also I will have to learn to edit as I don't have the first clue about it so if you know of any good tutorials please let me know. Anyway I'm gonna set out some sort of proper schedule, I've a few new bits I've bought that I'll review. I'm currently working on designing a new theme for my blog which is exciting and challenging as I haven't a clue about that either. Anyway I'll stop rambling and leave you with two photos of what I dressed up as for Halloween, I was a snow queen and it was a fun dramatic look to do!


Until next time,
RubySkullrose xx

Saturday 22 October 2011

How to revive a synthethic wig

Since it's so close to halloween I was thinking of costume ideas and looking at what I already had from previous halloweens. I found a white wig in my press which would be perfect for what I had in mind, the only problem though was that it was a complete frizzy mess!! I wondered how could I fix this and after a little research on the net here is what I came up with.

Here is what the wig looks like to begin with, a frizzy mess!!

Here is what your gonna need to sort this mess out:


  • A clip (to hold the straightened sections away from the section your working on)
  • Spray water (I used this La Roche Posay sample one but you could use a spray bottle)
  • A leave in conditioning spray (this will help restore a bit of shine and give the wig a nice smell)
  • A round bristle brush (for to brush the wig, I find these ones work best)
  • A hair straightener/curling iron (not pictured above) (you need something with an adjustable heat setting so you can apply just enough heat without melting the fibers, in this tutorial I use my curling iron to straighten as my ghd doesn't have an adjustable heat setting.
First off taking a section of the wig, start by misting the spray water on to the section you are working on, next mist a little of the conditioner on. We don't want the fibers to be too wet but just enough so we can mould it with the heat. Then take your curling iron or hair straightener and set it to the lowest possible setting in my case this was 150 degrees Celsius. Then straighten the section, you may want to test this on part of the wig where you can't see first just to make sure and not to cause any damage that can be seen!


Next take your round brush and brush the section you have just straightened.


And here is the result from that one section! Alot better than what we started with.


Continue this method around the whole wig and you will end up with an all together much looking wig that you can now reuse for this years Halloween


I hope this helps and please remember to use caution with heated hair tools and also to try the lowest possible setting first and adjust accordingly.  I was really nervous when I tried this as it is not usually recommended to use heated products with a synthetic wig so use at your own discretion,
Much love
     RubySkullrose xx